How To Create Artiste Fanlink
Setting Up a SmartLink to Track and Improve Conversion
It's easy to create a FanLink to direct your customers to their preferred store or platform. This lets you reduce drop-off, improve conversion, and make more money.
Click "+ Create a FanLink" to start creating your link. This article will take you through the process step-by-step.
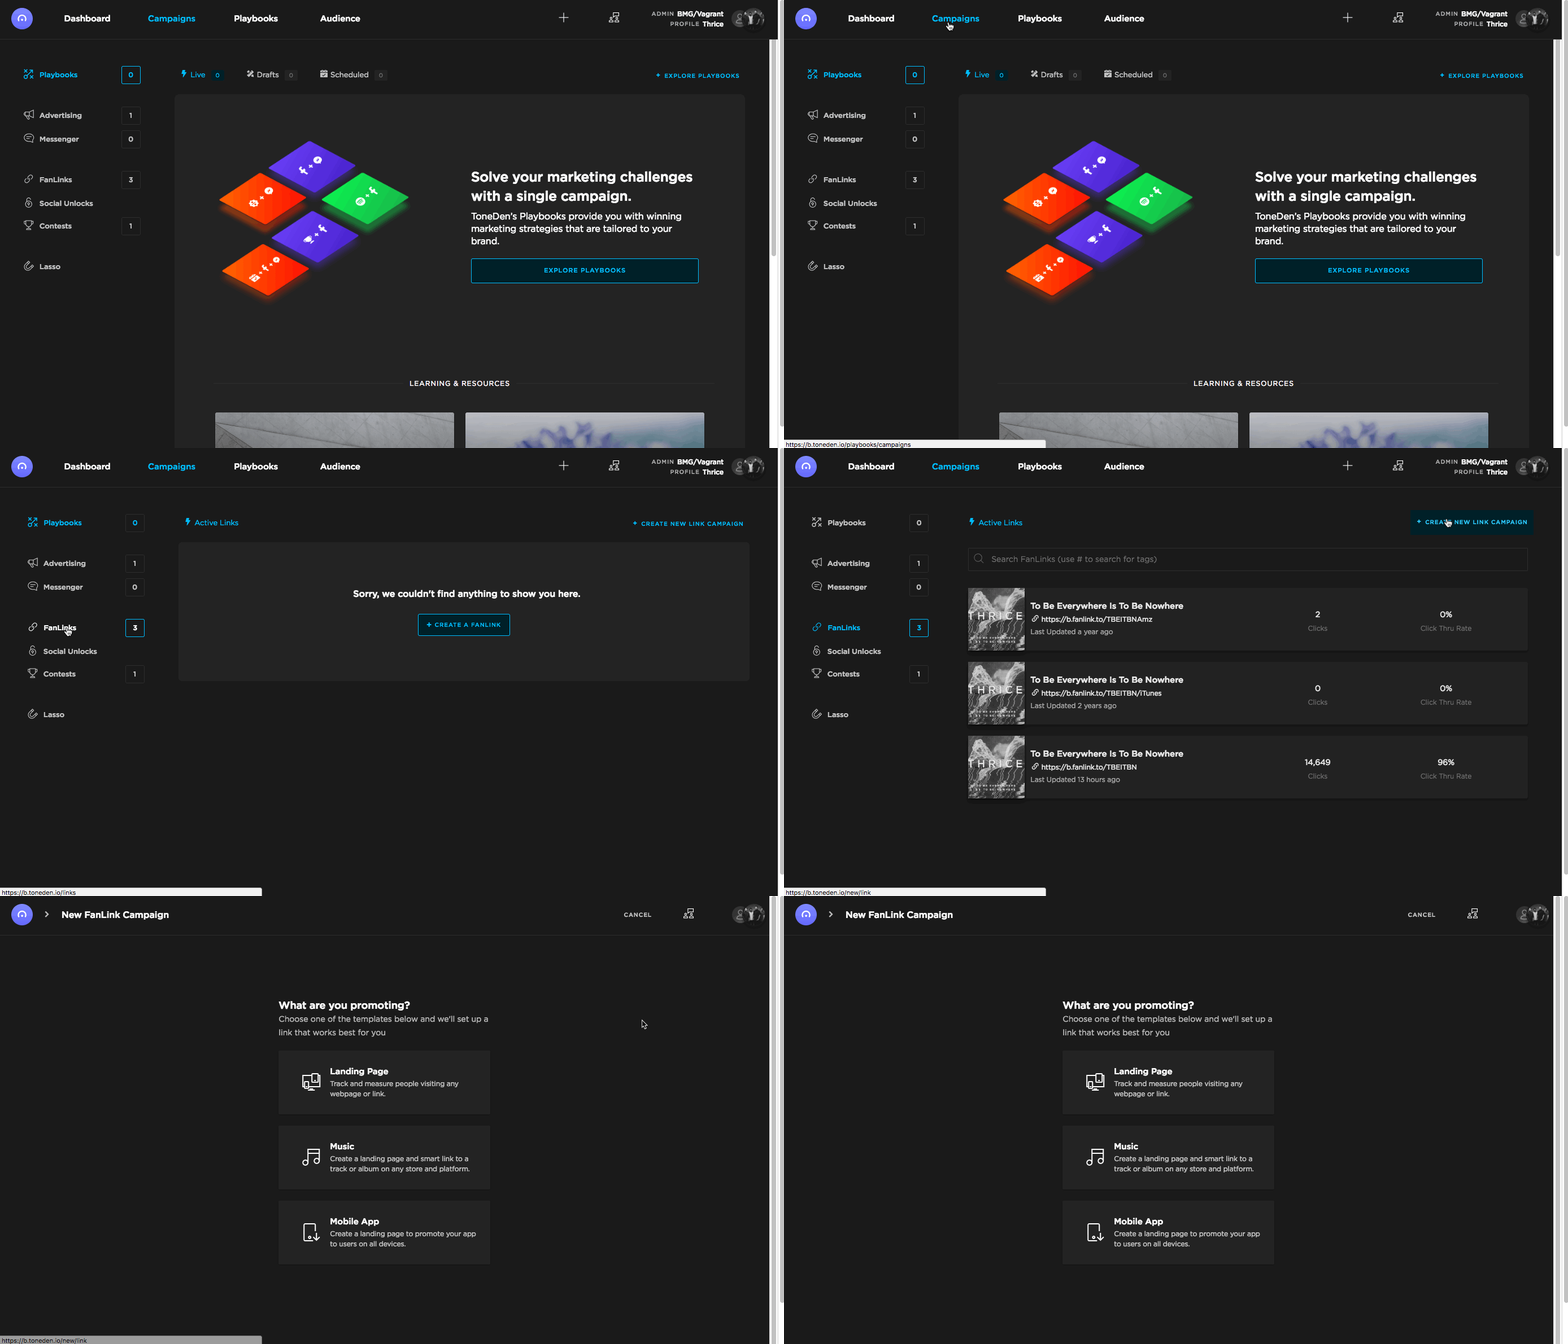
Step 1 - Choose which type of FanLink you'd like to create
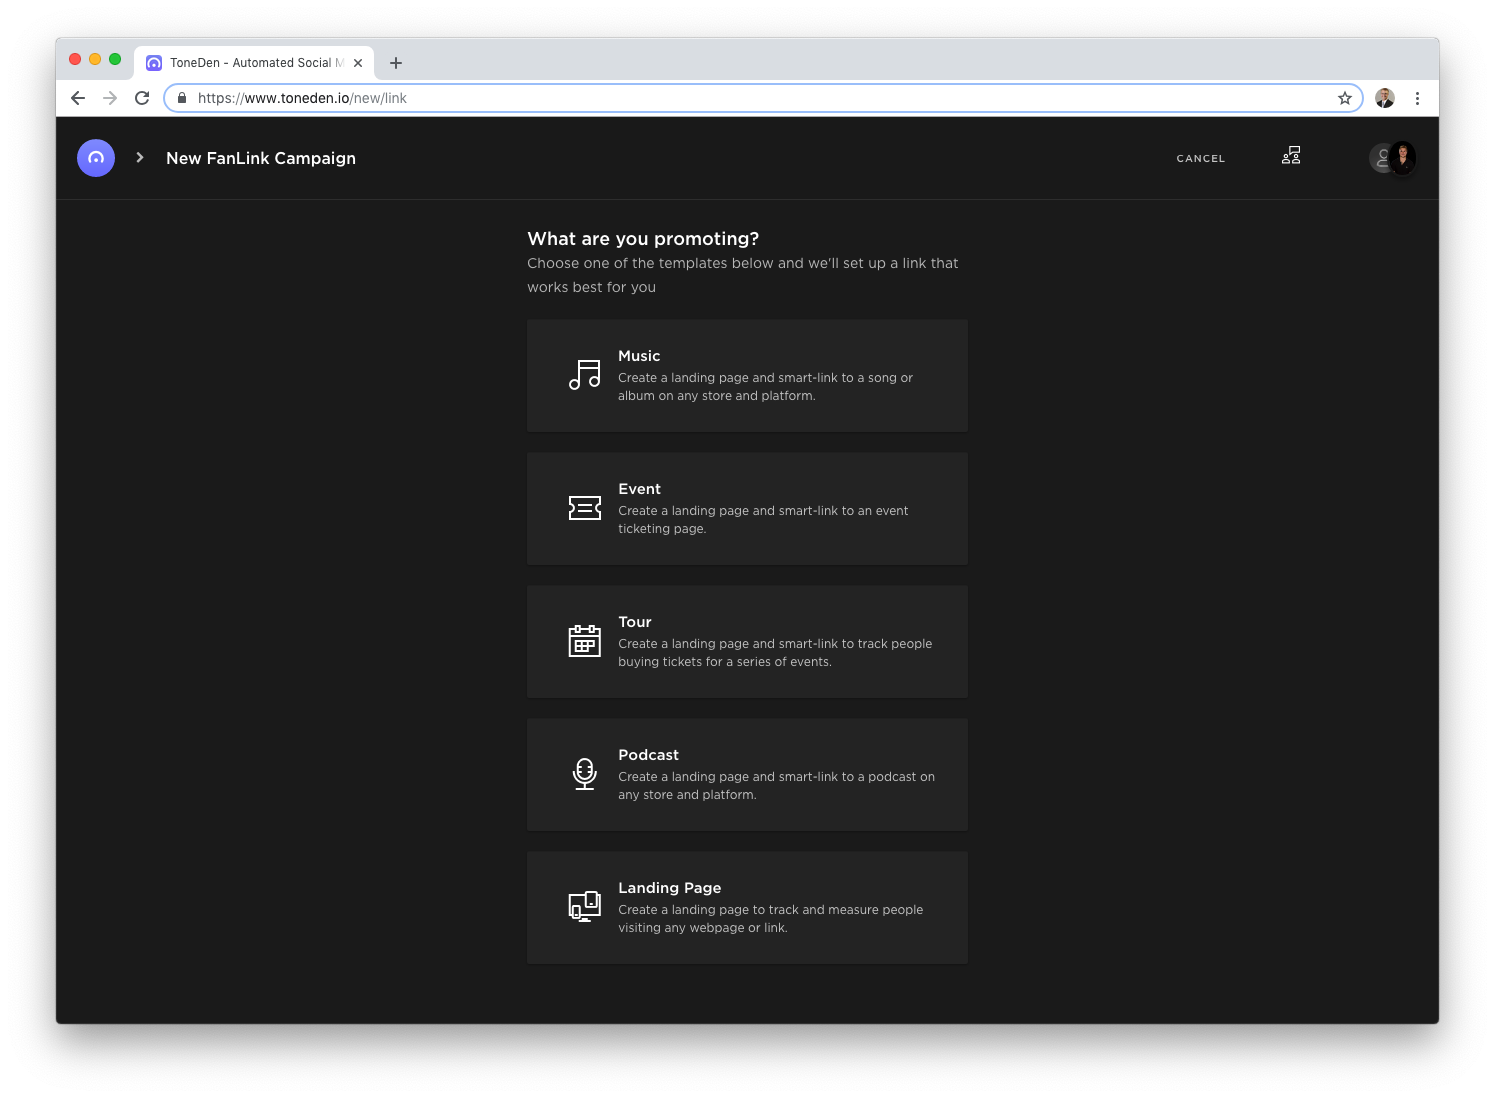
Choose the type of FanLink that best fits your brand. In this example, we'll continue as if you're an artist or label, so you'll want to choose "Music." We’ve designed special pages that route fans to the music they love in the apps they love.
None of these FanLinks fit your brand? Select the "Landing Page" option to create branded smart links and more.
Step 2 (Music) - Input your Song/Album's Spotify or iTunes URL
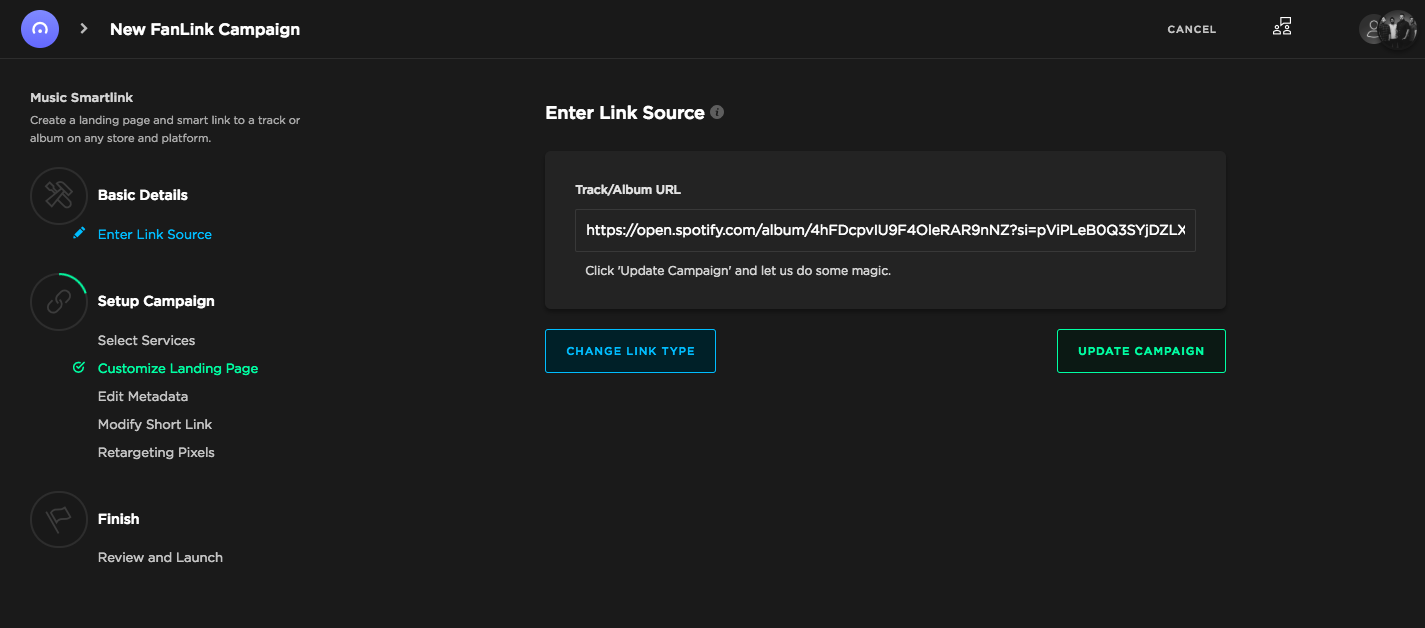
If you input your song/album's Spotify or iTunes URL, we'll instantly locate your music on other services like Amazon, etc.
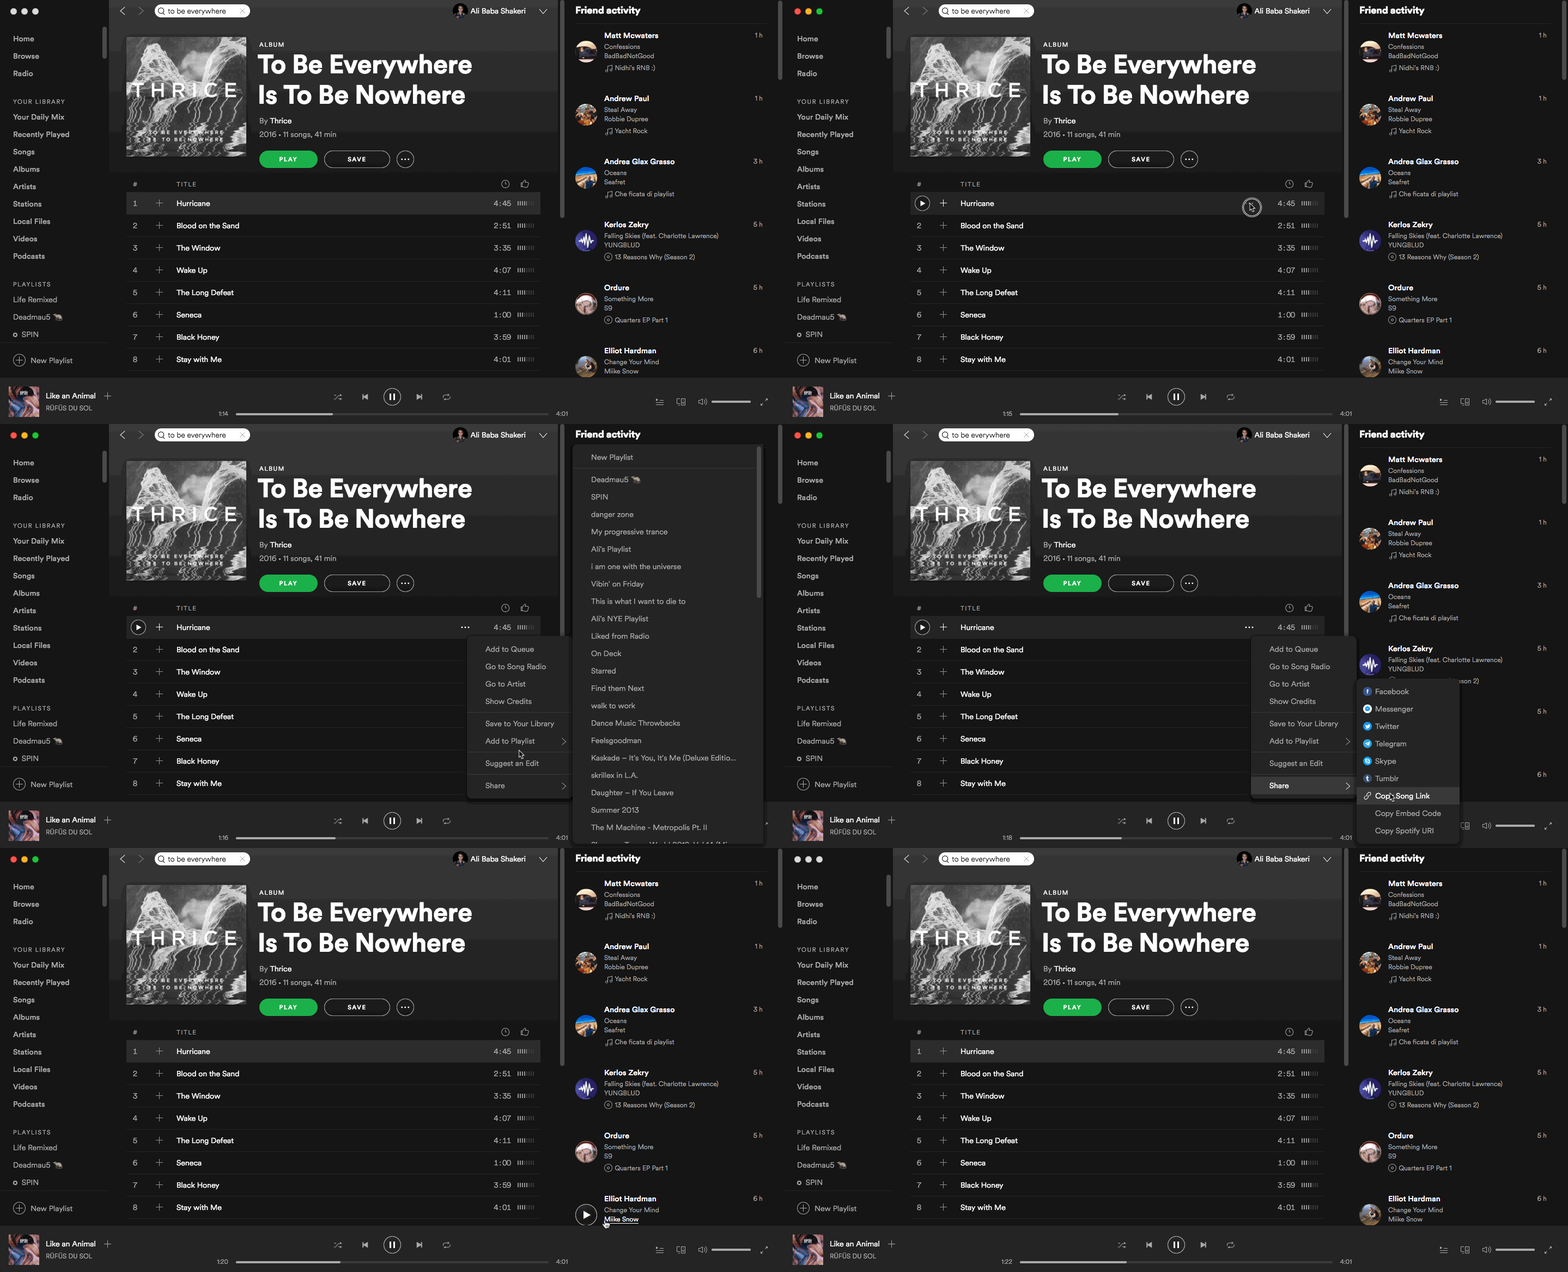
You can find your song or album's Spotify URL by performing these actions on Spotify:
Step 3 (Music) - Confirm the Stores You'd Like to Include
After you enter your iTunes or Spotify song/album URL, we'll locate your song/album on other retailers to include in your FanLink.
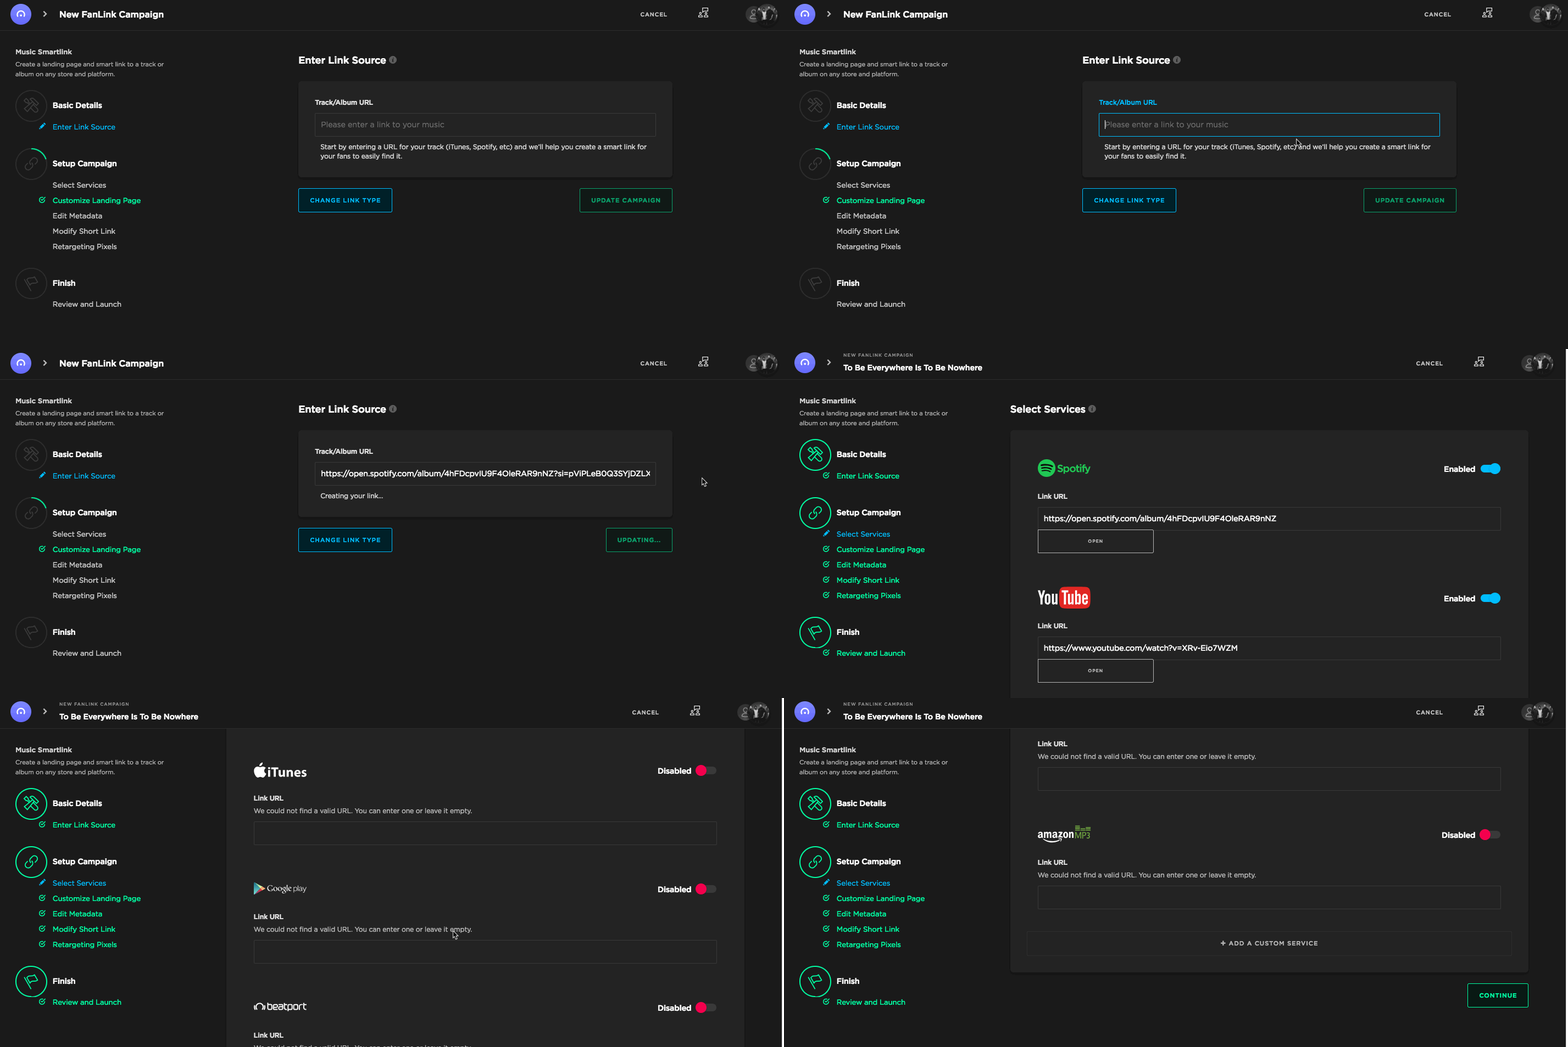
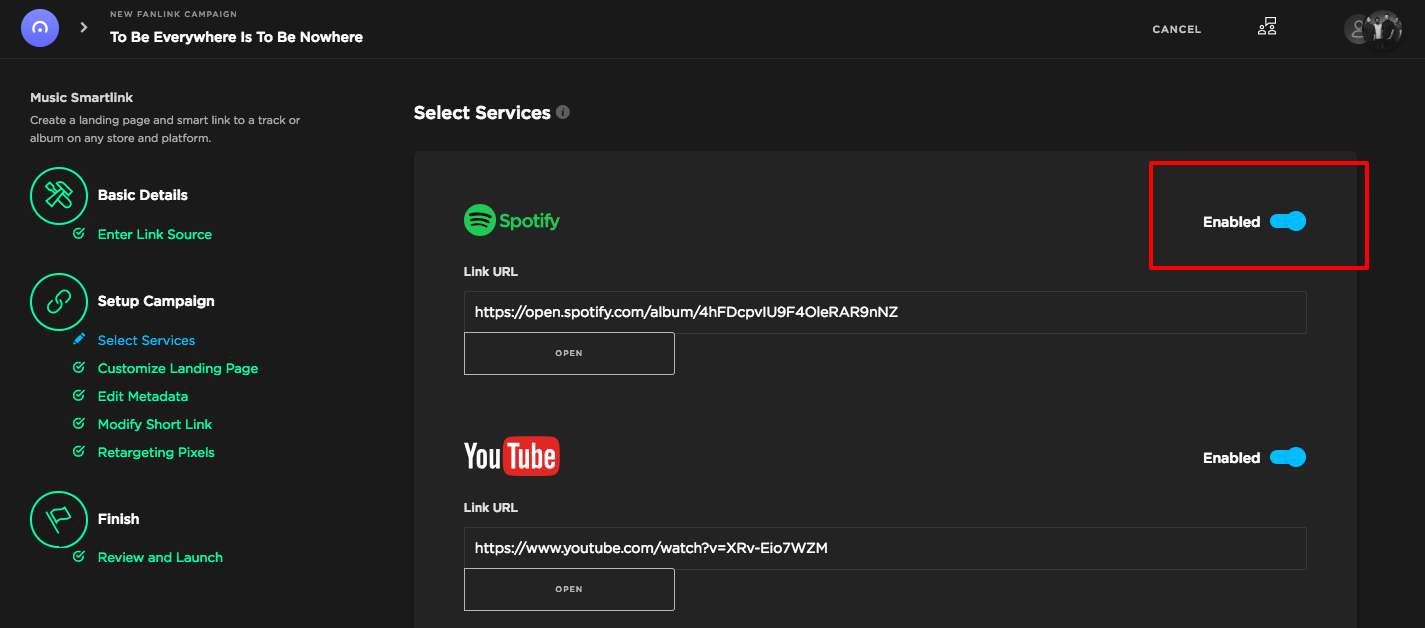
You can choose to exclude links to specific stores by pressing the button next to "Enabled," which then switches to "Disabled."
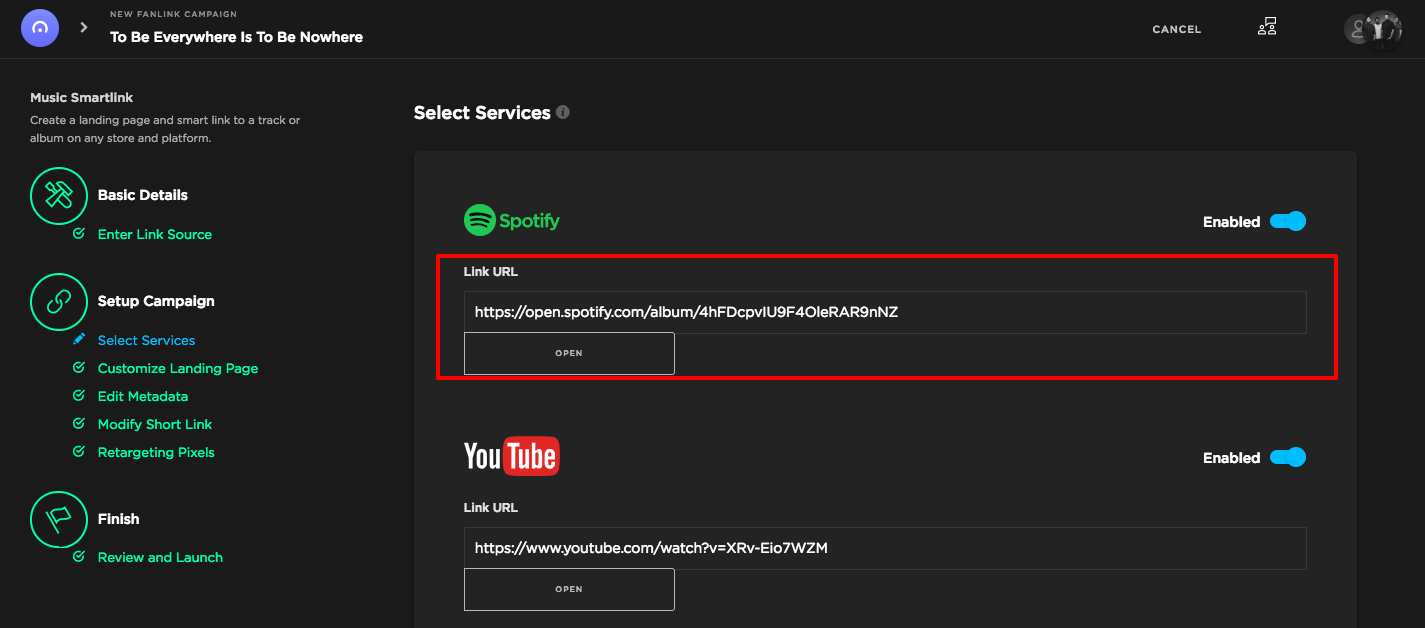
If you want to use a different link than what we suggest for the retailer, you can change the destination by typing below the retailer's icon.
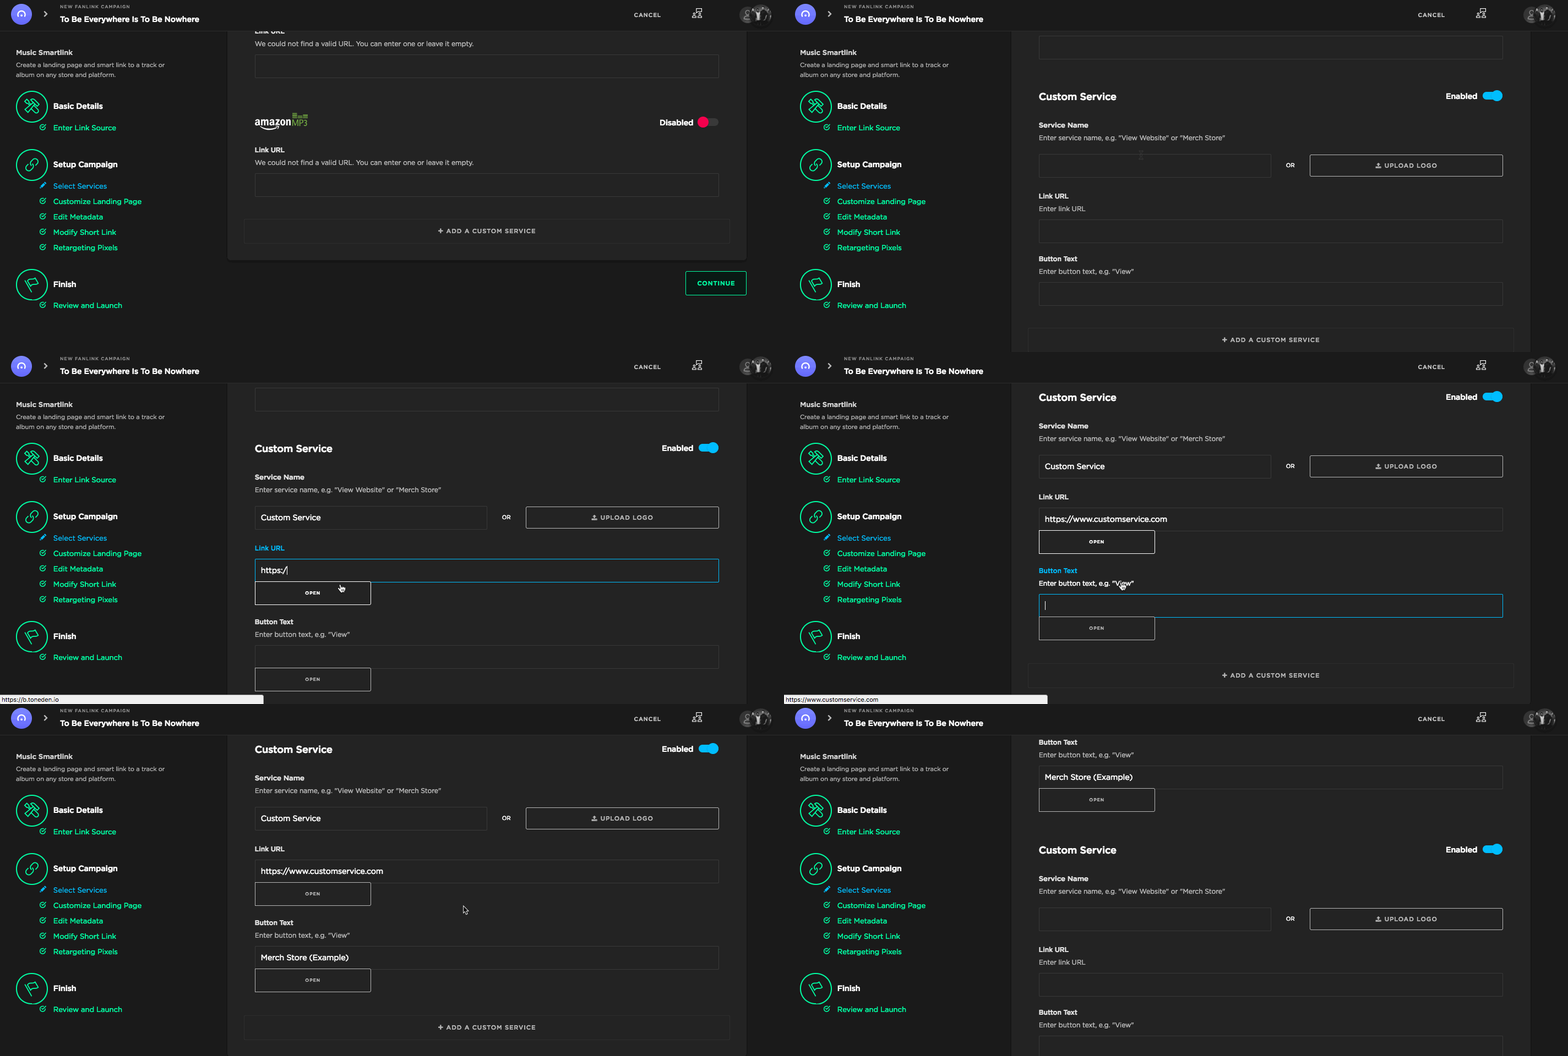
You can also choose to send fans to an alternative retailer or destination that isn't available yet. Just click on "Add Custom Service," input the service name and the service destination, and select "Enabled."
Step 4 (Music) - Customize Your Landing Page
Use this menu to customize your landing page.
Input your song’s title, your song’s description, and upload a unique landing page image if you’d like.
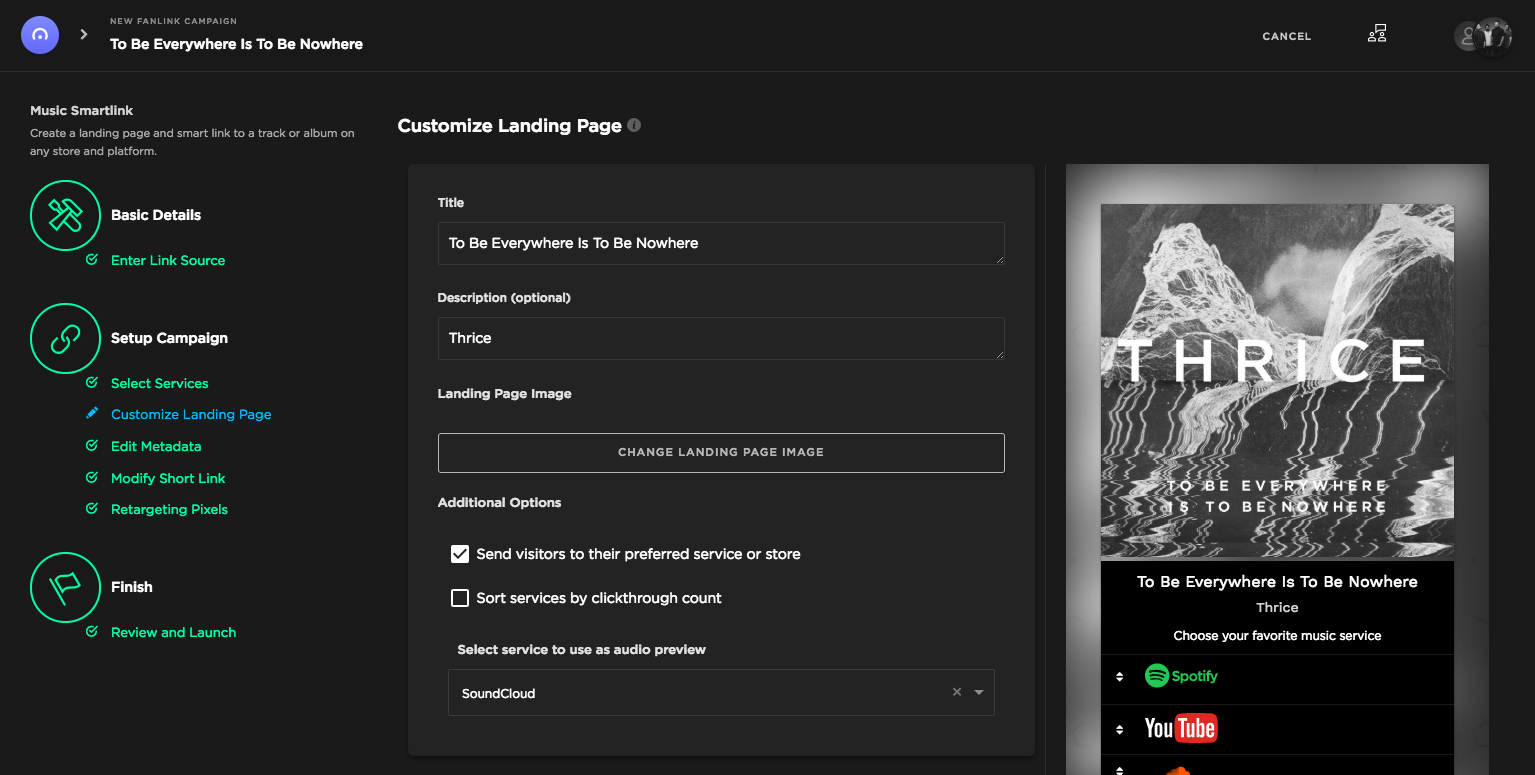
You can choose whether or not you’d like to automatically redirect users to the streaming platform of their choice if they’ve visited one of your FanLinks in the past.
You can choose whether you’d like the order of your displayed streaming services to remain fixed or shift based on click-throughs.
You can choose which streaming platform you'd like your audio to preview from.
And, you can customize the order in which you’d like streaming services to appear to fans.
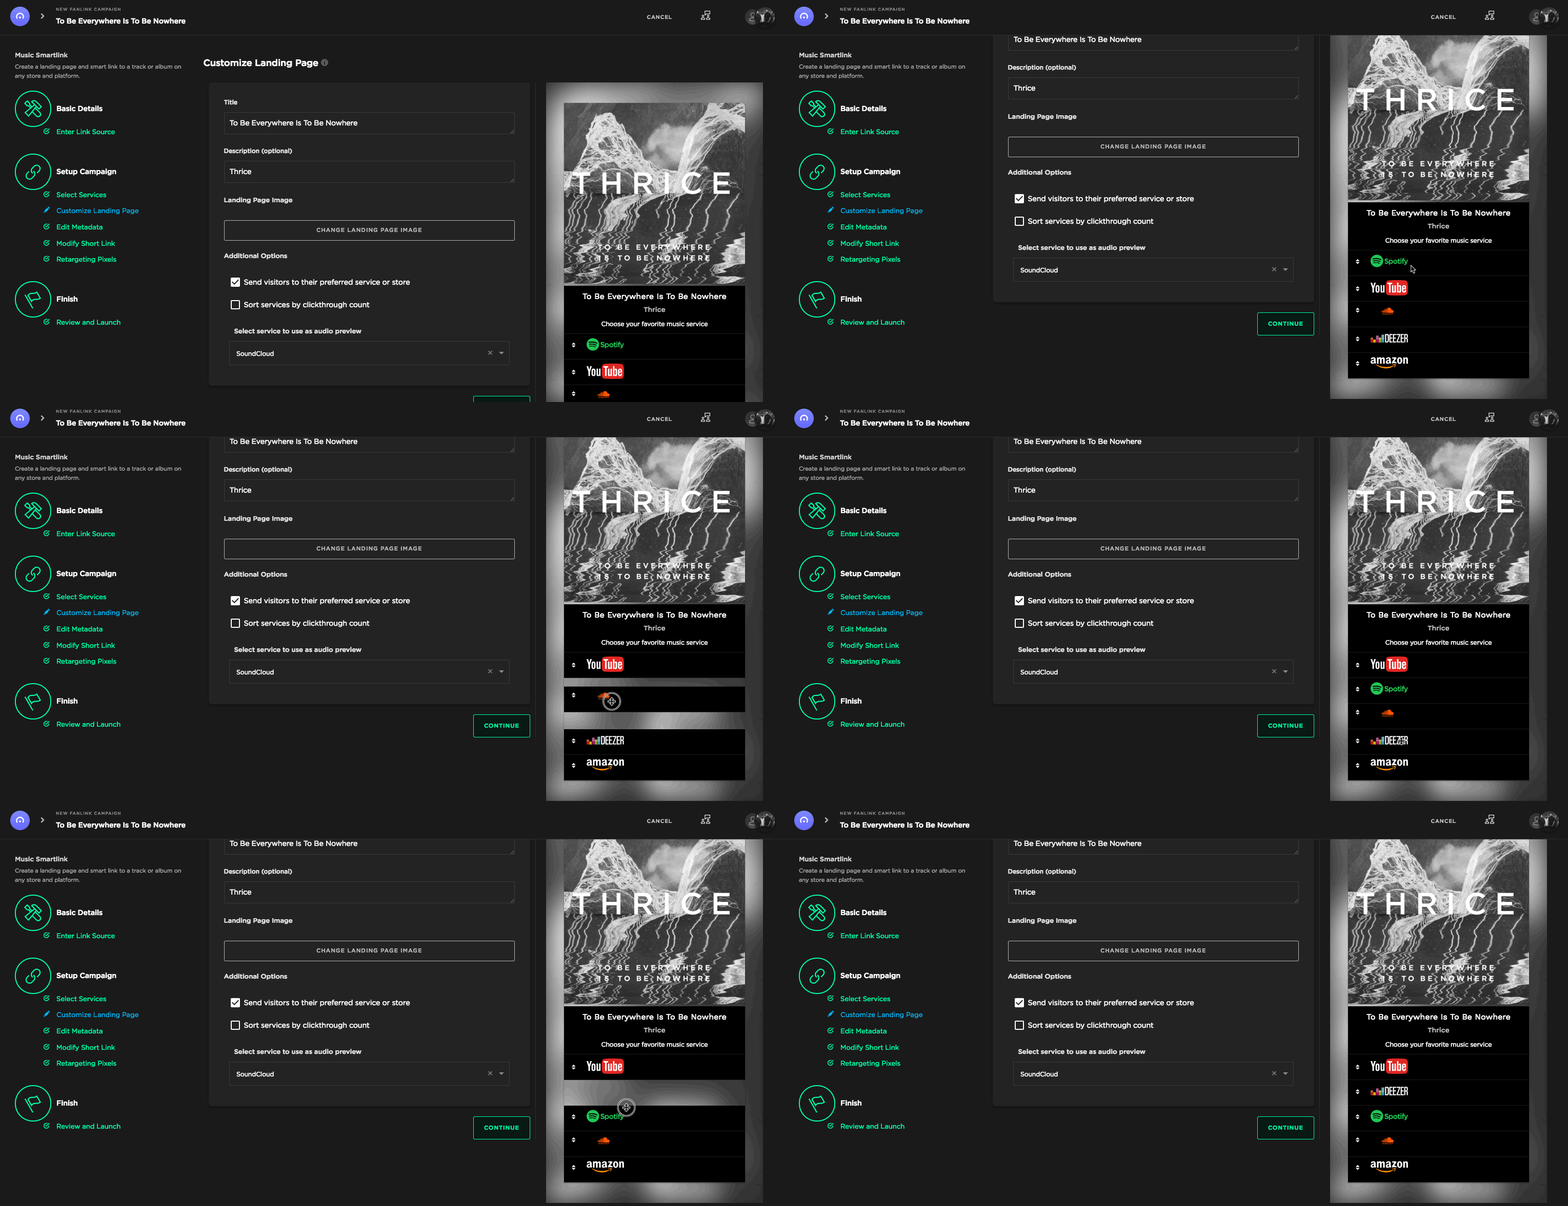
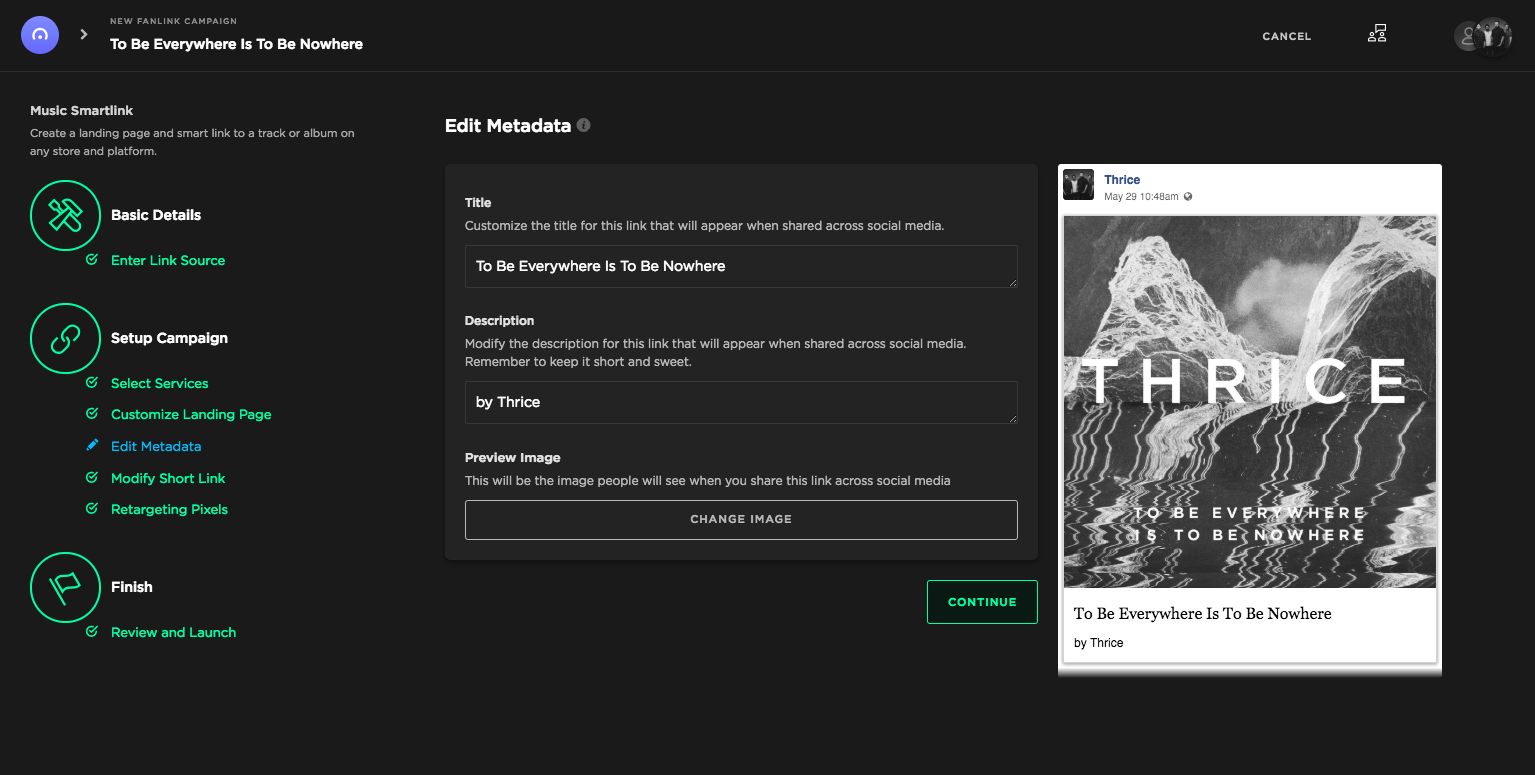
Step 5 (Music) - Edit Your Song/Album's Metadata
We provide you with the ability to control how your link displays on Facebook, Twitter, and other social channels.
Step 6 (Music) - Modify Short Link (optional)
If you'd like your URL to have a specific name, you can change the short link information here.
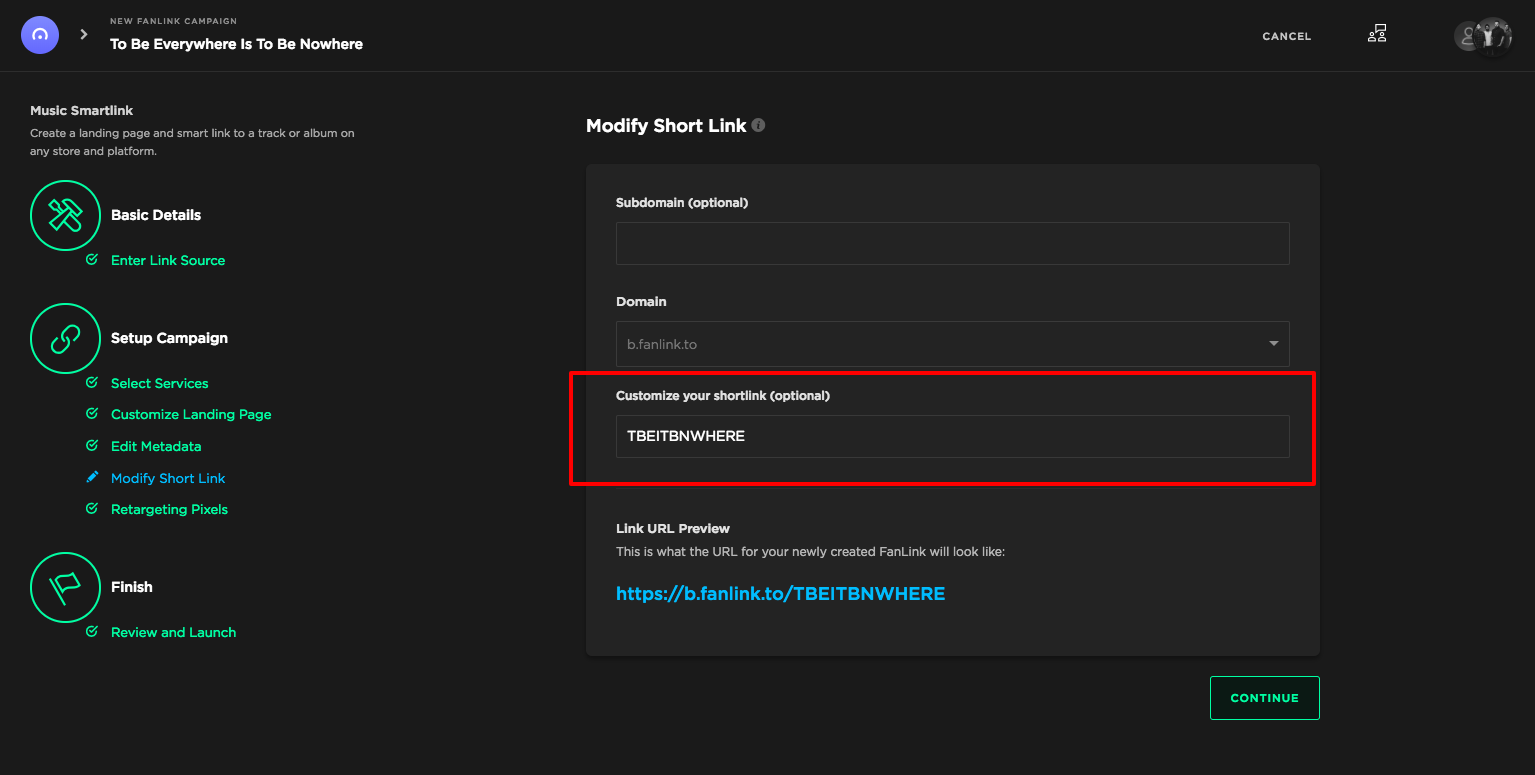
We also offer the ability to create custom URLs. Send us a note to get more info.
Step 7 (Music) - Add Your Retargeting Pixels (optional)
If you plan on advertising to your fans, add your retargeting pixels here.
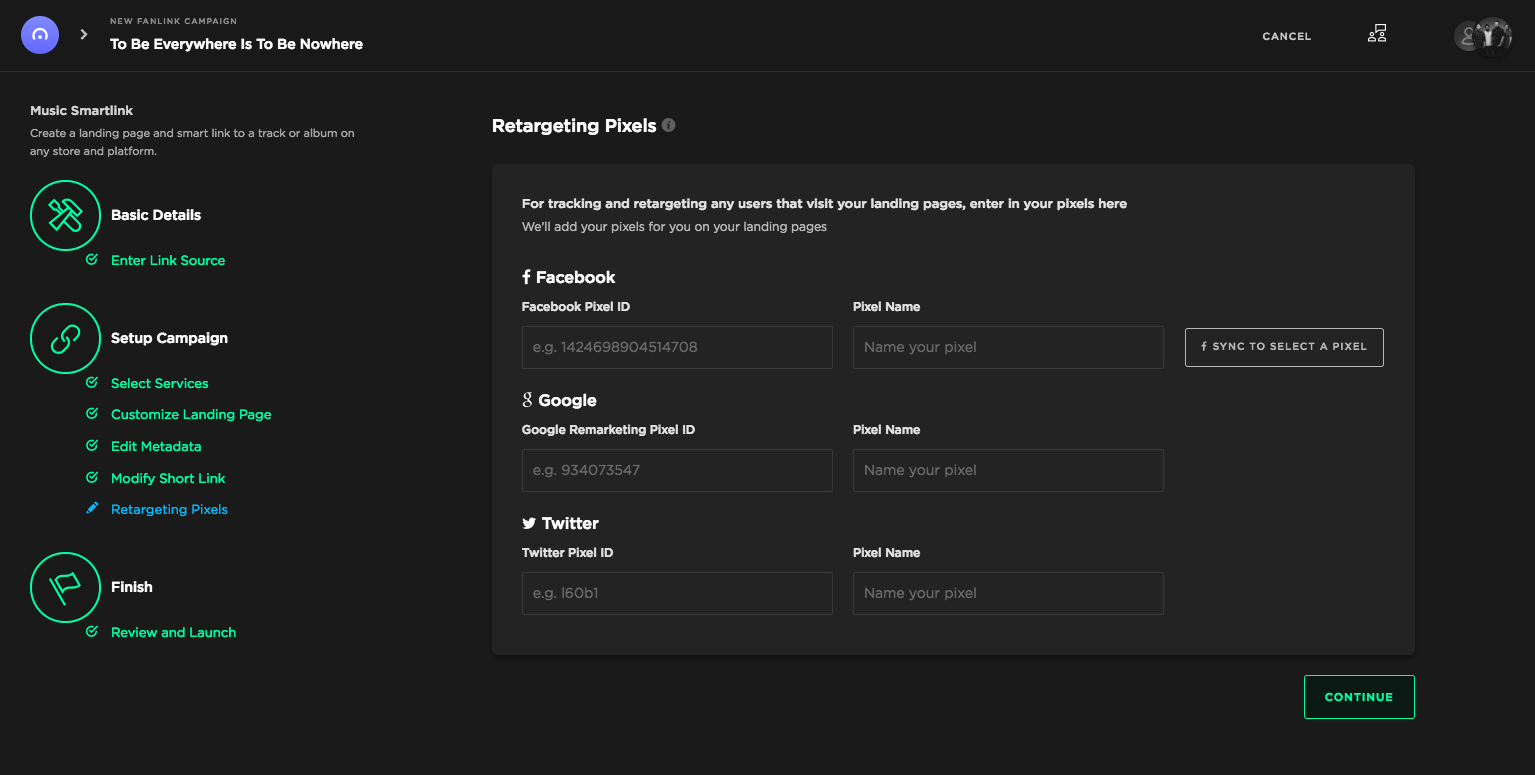
Retargeting allows you to serve ads directly to individuals who have clicked on your links in the past.
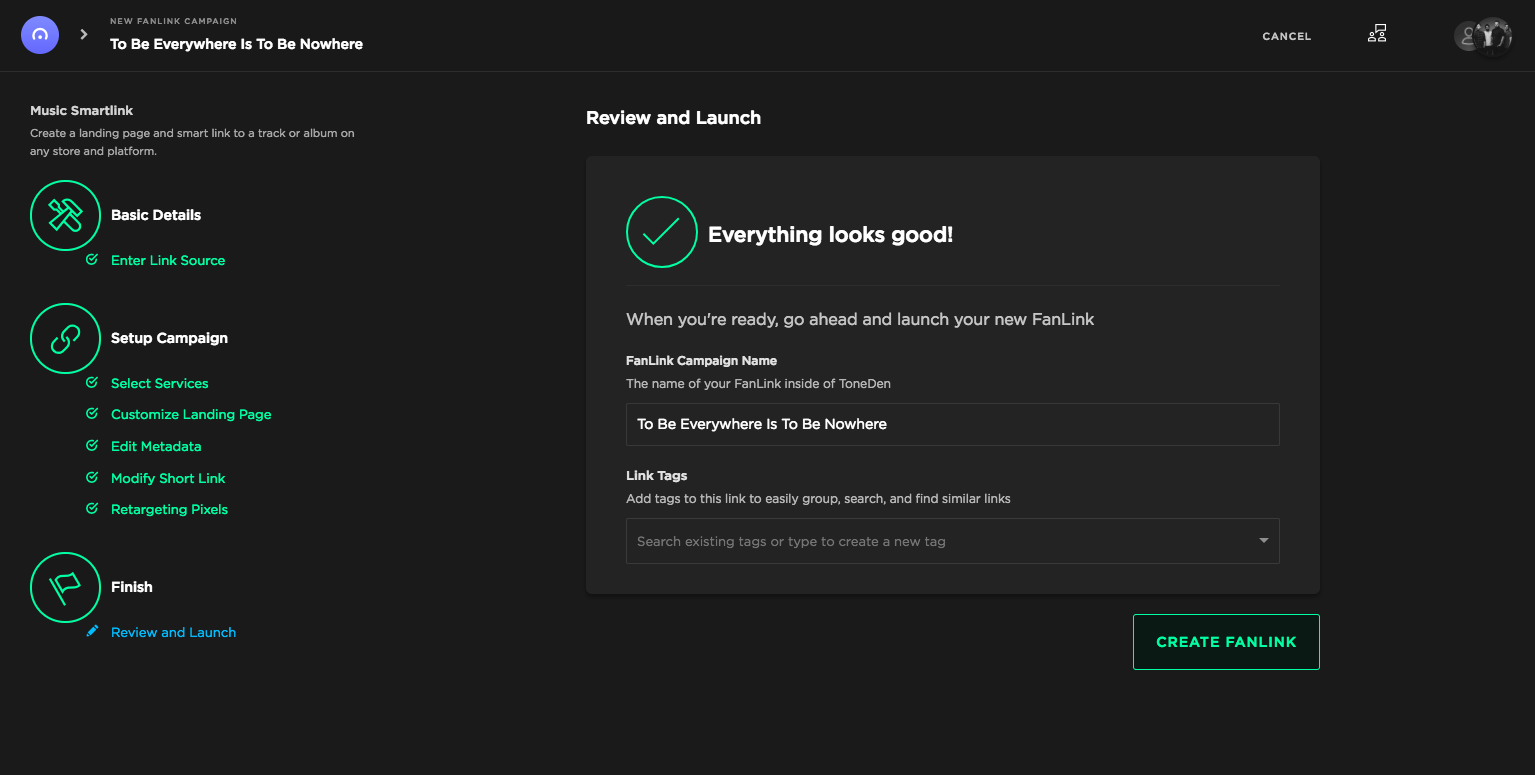
Step 8 (Music) - Review and Launch
If you’d like to organize your FanLinks, you can create tags for them (e.g. “Album Name”).
After you've double-checked everything, press "Create FanLink" and you're good to go!


Comments
Post a Comment